
What is full frame window removal?
Full frame window removal is the complete extraction of a window unit, including its entire frame, back to the original rough opening in the wall. Unlike a simple sash swap, this process removes the head, side jambs, and sill, leaving only the structural framing of the wall itself. The result is a clean slate for installing a new window with modern sealing and insulation techniques.
Homeowners and contractors choose this method for several clear reasons:
- Damaged or rotted frames that compromise structural integrity or allow water infiltration
- Warped or out-of-square frames that prevent proper sealing and cause drafts
- Design or size changes where a new window configuration does not fit the existing frame
- Hidden moisture damage or poor insulation discovered only when the wall cavity is exposed
- Full compliance with ASTM E2112 flashing, air sealing, and installation standards for long-term performance
- Renovation projects combining window replacement with siding, insulation, or structural work
The process is more involved than an insert replacement, but it delivers a complete reset of the window system, which is exactly what damaged or aging frames require.
How do you decide between full frame removal and insert replacement?
The condition of your existing frame determines which method makes sense. Full frame replacement is the right call when the frame shows rot, warping, or active leaks, or when you want to change the window’s size, style, or placement. Insert replacement, also called pocket replacement, fits a new window unit inside the existing frame and works well when the frame is structurally sound, square, and dry.
Factors to evaluate before choosing your method:
- Frame condition: probe the sill and jambs for soft spots, discoloration, or visible rot
- Squareness: a frame that is out of square will prevent a new insert from sealing correctly
- Air and water leaks: persistent drafts or staining around the frame indicate failure beyond the sash
- Window size or style change: any change to the rough opening requires full frame removal
- Renovation scope: if siding or insulation work is already planned, full frame removal adds minimal disruption
Insert replacements cost $100–$400 per window, while full frame replacements range from $180 to $1,500 depending on size, material, and style. The insert method is faster and less disruptive, but it cannot address structural or moisture problems hidden behind the existing frame.
Pro Tip: Before committing to either method, use a moisture meter on the sill and lower jambs. Readings above 19% moisture content in wood indicate conditions where rot is likely active, and an insert replacement will only conceal the problem.

For homeowners weighing retrofit vs. new construction frames, the frame condition assessment is the single most important step before any purchase decision.
Step-by-step process for removing a full frame window
The full frame removal process requires careful sequencing to protect surrounding wall materials. Here is the standard procedure:
- Prepare the work area. Lay drop cloths inside and outside. Wear safety glasses and gloves. Have a reciprocating saw, utility knife, pry bar, putty knife, and hammer ready.
- Score interior trim. Run a utility knife along the joint between the interior casing and the wall to minimize drywall tearing when the trim is removed.
- Remove interior trim. Pry the casing away from the wall carefully, working from the corners inward.
- Score exterior sealant. Cut through the caulk or paint line between the exterior siding and the window frame on all four sides.
- Remove sashes. Take out the screen, vent sash, and fixed sash. For sliding windows, lift and slide out of the channel. For hung windows, tilt and release from the balance assembly.
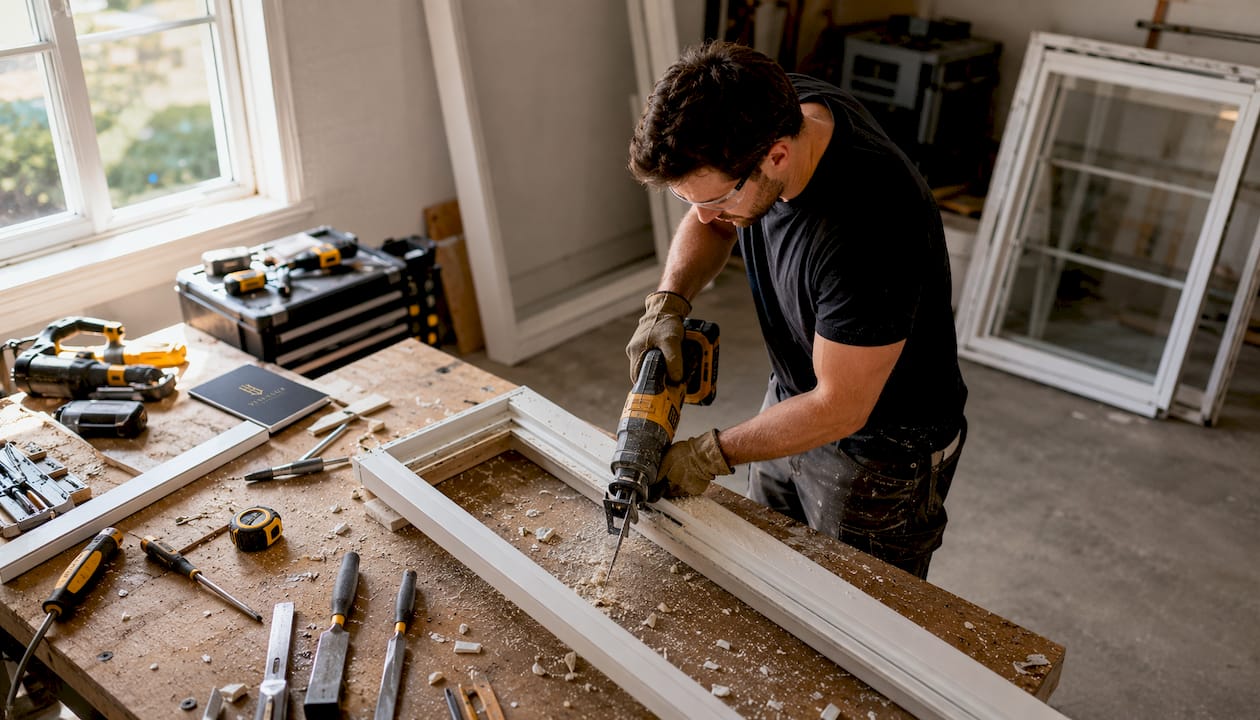
- Cut out the frame. For vinyl, clad wood, or aluminum frames, temporarily pry up any head flashing, then cut through the sealant line and nailing fin on all four sides with a reciprocating saw. Keep the blade shallow to avoid penetrating the drywall behind.
- Extract the frame. Pull the frame free from the rough opening. Remove any remaining fasteners or nailing fins.
- Inspect and clean the rough opening. Remove old sealant, debris, and any damaged sheathing before the new window goes in.
- Dispose or recycle materials. Aluminum and vinyl frames are recyclable. Cast iron sash weights, found in older double-hung windows, should be recycled separately.
Cutting aluminum or vinyl frames out of the opening requires a sharp reciprocating saw blade and a steady hand. Rushing this step is the most common cause of drywall damage.
Risks, costs, and timeline you should plan for
Full frame removal opens the wall cavity, which creates real exposure to several risks. Understanding them upfront lets you plan accordingly.
Common risks and how to address them:
- Drywall damage from saw blades or aggressive prying; score all joints before cutting
- Siding damage at the nailing fin perimeter; use a thin pry bar and work gradually
- Moisture intrusion during the open period; schedule work during dry weather and have flashing materials ready
- Structural surprises such as damaged jack studs or headers discovered only after frame removal
Cost and timeline considerations:
Full frame replacements range from $180 to $1,500 per window, compared to $100–$400 for insert replacements. The higher cost reflects the additional labor, the need for new exterior trim, and any repairs to the wall cavity. Projects that uncover moisture damage or require structural repairs extend the timeline further. A straightforward full frame swap on a single window typically takes a half day for an experienced installer; a window with hidden rot or insulation work can stretch to a full day or more.
Full frame removal projects generally have longer timelines than insert replacements because of the inspection and repair work that often follows opening the wall. Budget time for that possibility, not just the removal itself.
Professional insights and best practices
Water management after removal is where many DIY projects fall short. Professionals consistently point to flashing tape and weather-resistant barriers as the most critical and most overlooked elements of the post-removal process. The Building America Solution Center specifies that new installations follow ASTM E2112-07, the standard practice for exterior window and door installation, covering proper flashing, air sealing, and water management sequencing.
Full frame removal is also the most cost-effective moment to address hidden moisture problems. Once the wall cavity is open, adding a weather-resistant barrier and proper flashing costs a fraction of what remediation would cost after a new window is installed over unresolved damage. Professionals who follow the aluminum window installation sequence consistently report fewer callbacks and warranty claims.
Pro Tip: Apply flashing tape to the sill pan first, then the jambs, then the head, lapping each layer over the one below. This shingle-style layering directs any water that penetrates the exterior outward rather than into the wall cavity. Most DIYers reverse the order at the head, which creates a water trap.
Viewluxwindows products carry NFRC and AAMA certifications, and the brand’s 26-step production process is designed to meet the installation standards that professionals rely on for long-term performance. For detailed guidance on meeting ASTM E2112 requirements, the Viewluxwindows resource on flashing an aluminum window covers the full sequence.
What to do after the frame is out
Once the old frame is removed, a thorough inspection of the rough opening is not optional. Check the jack studs, king studs, and header for soft spots, staining, or compression damage. Any compromised framing must be repaired or sistered before the new window goes in. Probe the sill plate carefully since it sits closest to the exterior and absorbs the most moisture over time.
Wall repair follows the framing inspection. Patch or replace damaged sheathing, then apply a weather-resistant barrier across the rough opening. Seal the sill pan with flashing tape before any new window touches the opening. If the rough opening dimensions have changed due to repairs, recheck measurements against the new window’s specifications before ordering or installing.
Should you hire a professional or tackle this yourself?
Full frame removal is within reach for a confident DIYer with the right tools, but several conditions push the job toward professional territory.
Hire a professional when:
- The frame shows active rot or structural damage requiring framing repairs
- The window is large, heavy, or located on an upper floor
- Exterior cladding is stucco or brick, which requires specialized cutting and patching
- You are unfamiliar with flashing sequencing per ASTM E2112
DIY is reasonable when:
- The frame is damaged but the surrounding framing is sound
- The window is standard size and accessible from ground level
- You have experience with a reciprocating saw and basic carpentry
- You can dedicate a full day without weather interruptions
Getting the flashing sequence right is the single most consequential skill in this job. A window installed without proper water management will leak regardless of its quality. If there is any uncertainty about the sealing process, bringing in a professional for at least the installation phase protects the investment. Homeowners considering premium window upgrades should factor professional installation into the total project cost to preserve both performance and property value.

Viewluxwindows offers direct-to-consumer pricing on NFRC and AAMA certified aluminum windows, with showrooms in California, Colorado, and Nevada. Explore the full product range at viewluxwindows.com.
Key Takeaways
Full frame window removal delivers a complete structural reset that insert replacement cannot match, making it the correct choice whenever the existing frame is damaged, out of square, or concealing moisture problems.
| Point | Details |
|---|---|
| Full frame vs. insert scope | Full frame removal goes back to the rough opening; insert replacement works within the existing frame. |
| Cost range | Full frame replacements run $180–$1,500 per window; insert replacements cost $100–$400. |
| ASTM E2112 standard | Proper flashing, air sealing, and water management sequencing per ASTM E2112-07 governs quality installations. |
| When full frame is necessary | Damaged, rotted, warped, or out-of-square frames require full removal; sound frames can accept an insert. |
| Flashing sequence matters | Apply flashing tape sill-first, then jambs, then head, to direct water outward rather than into the wall cavity. |
Recommended
- Aluminum Window Installation Sequence: 2026 Builder Guide – ViewLux Windows And Doors, Inc.
- Retrofit vs. New Construction Window Frames: 2026 Guide – ViewLux Windows And Doors, Inc.
- Replace Old Windows with Aluminum Retrofit: 2026 Guide – ViewLux Windows And Doors, Inc.
- Blog – ViewLux Windows And Doors, Inc.


